Showing posts with label beekeeper. Show all posts

Tuesday, August 13, 2013

Tutorial: $7 Hive Stand


   Finally! The long awaited $7 hive stand tutorial! Sorry it took so long. I know it's been mentioned at least three times before. I've been throwing all of my energy and time into 7 day work weeks (first day off tomorrow in 3 1/2 weeks woo!), with the end goal being the purchase of a nice bee and agriculture friendly parcel of land. It took a while, but things have finally fallen into a rhythm. Now it's time to play catch up with the blog!

   So, for a while I'd been using cinder blocks as a base for my hives. Unfortunately, cinder blocks provide LOTS of surface area for ant activity. Before I knew it, the base of my cinderblocks had become causeways for fire ants. On the positive side, the ants are more interested in dead bees than honey. The ants have been doing an excellent, and very timely, job of keeping the ground free of dead bees. This in turn keeps away more serious pests, and the stray ants do get bullied away from the hive interior by guard bees. It's actually really neat to see! Without physically feeling the wind that comes off of a single bees wings, one would never guess just how powerful they are. If I had three bees on my veil to act as fans at all times, I'd never break a sweat. These girls pack some serious horsepower in those wings! When I was removing the bees from the toolshed, the floor had ended up being covered in sawdust. There'd be the occasional bee lazily flying around the shed about 2 feet off the floor. Those bees would be parting the sawdust in the same way that a boat splits the ocean to create a wake. It's not uncommon to see a guard bee chase an ant to the edge of the entrance, and then turn around to literally blow the ant off the edge with air buffets from it's wings! Crazy girls. They impress me every time I visit the hives.


   That being said, it's a sad fact of beekeeping that it's not uncommon to crunch a bee or three between the outer cover (lid of the hive w/ aluminum covering) and the inner cover or sides of the hive. Ants love to get in there and clean up whoever got crunched. It's a nice service, but I do worry about them overcoming a weak hive, or setting up a nest between the top & inner cover, and going for larvae. So we need something better than cinder blocks. This calls for an actual hive stand with wooden legs!
 
   The nice thing about wooden legs is that it's possible to sit them in cans of motor oil. Motor oil creates an impassible moat that the ants won't be able to cross. Presto! Ant free bee hives! Vegetable oil is no good by the way. It instantly absorbs moisture from the air and will spoil real quick. That in turn will just attract more pests/mold, compounding the problem.


   After a short interwebs search, I came across several really popular designs and YouTube videos for creating ladder-like hive stands. These in turn were set on cinder blocks, which was no good, but the concept was sound! The best part of these hive "ladder" stands is that they're made from $5 2x4's, the most common piece of lumber around. I also found a few designs that had legs, but they were all sorts of overly complicated. In addition, the weight bearing segments had all of the weight resting on the nails... That just didn't make sense to me. Above is one of the popular designs with legs. I'd much prefer having the weight bearing wood, that over 200lbs of hive rests on, be resting on the legs so that the wood of the legs is where the pressure would be concentrated. Is it just me, or does the design above just beg to have the hives come crashing down once the nails rust enough to bend? If those nails come out, then there goes the support for the horizontal beams, and down they go.


   Here's my design. It's simple, sturdy, and the horizontal beams are situated on TOP of the legs. That way, the weight bears down on the legs, and is distributed by the horizontal beams. That way the nails mainly serve to connect the boards so that there's no movement in the boards. The weight is supported by the density and integrity of the wood, rather than on the integrity of the nails. I'd bet on the nails more quickly rotting through in a 24/7 outdoor environment than this copper weather-treated wood.

   I'm not naive enough to think that no one has come up with this design before, but I wasn't able to find it anywhere else. So I'm going to be willfully ignorant and bask in my own ingenuity for the time it takes to write this tutorial haha.

$7 Hive Stand Tutorial:

Materials For 2 Stands  
3 - 2x4 8" Weather Treated lumber
1 - Saw (I use a Japanese style "ryoba" pull saw)
32 - Weather Treated self-starting 2 1/2" screws
1 - Electric Driver/Drill with a screw-appropriate bit
1 - Measuring Tape
1- Pencil
1 - Pair of gloves (I use soft calf hide. The wood treated lumber is construction grade and will splinter the heck of you real quick, not to mention avoiding the absorption of weathering treatment)
1 - Breathing mask (if sawing in a low-breeze area, you don't want to inhale the moist copper and chemical infused sawdust, seriously.)
1 - Bottom board of a nuc box, if on hand


Step 1) 
Measure out your wood! For two of the 2x4s, you'll want to measure out two 3' pieces and two 1' pieces. The longer pieces will be the horizontal supports, and the smaller will be braces.
The third 2x4 you'll want to cut into four pieces, which are 2' each. These will be the legs.


Step 2)
Use the bottom board of a nuc box to layout the pieces. I didn't see this anywhere, but it just "worked" when I needed something to hold my long boards in place while drilling out these holes. I was a cheapskate and didn't buy self-drilling screws. Learn from my mistakes!
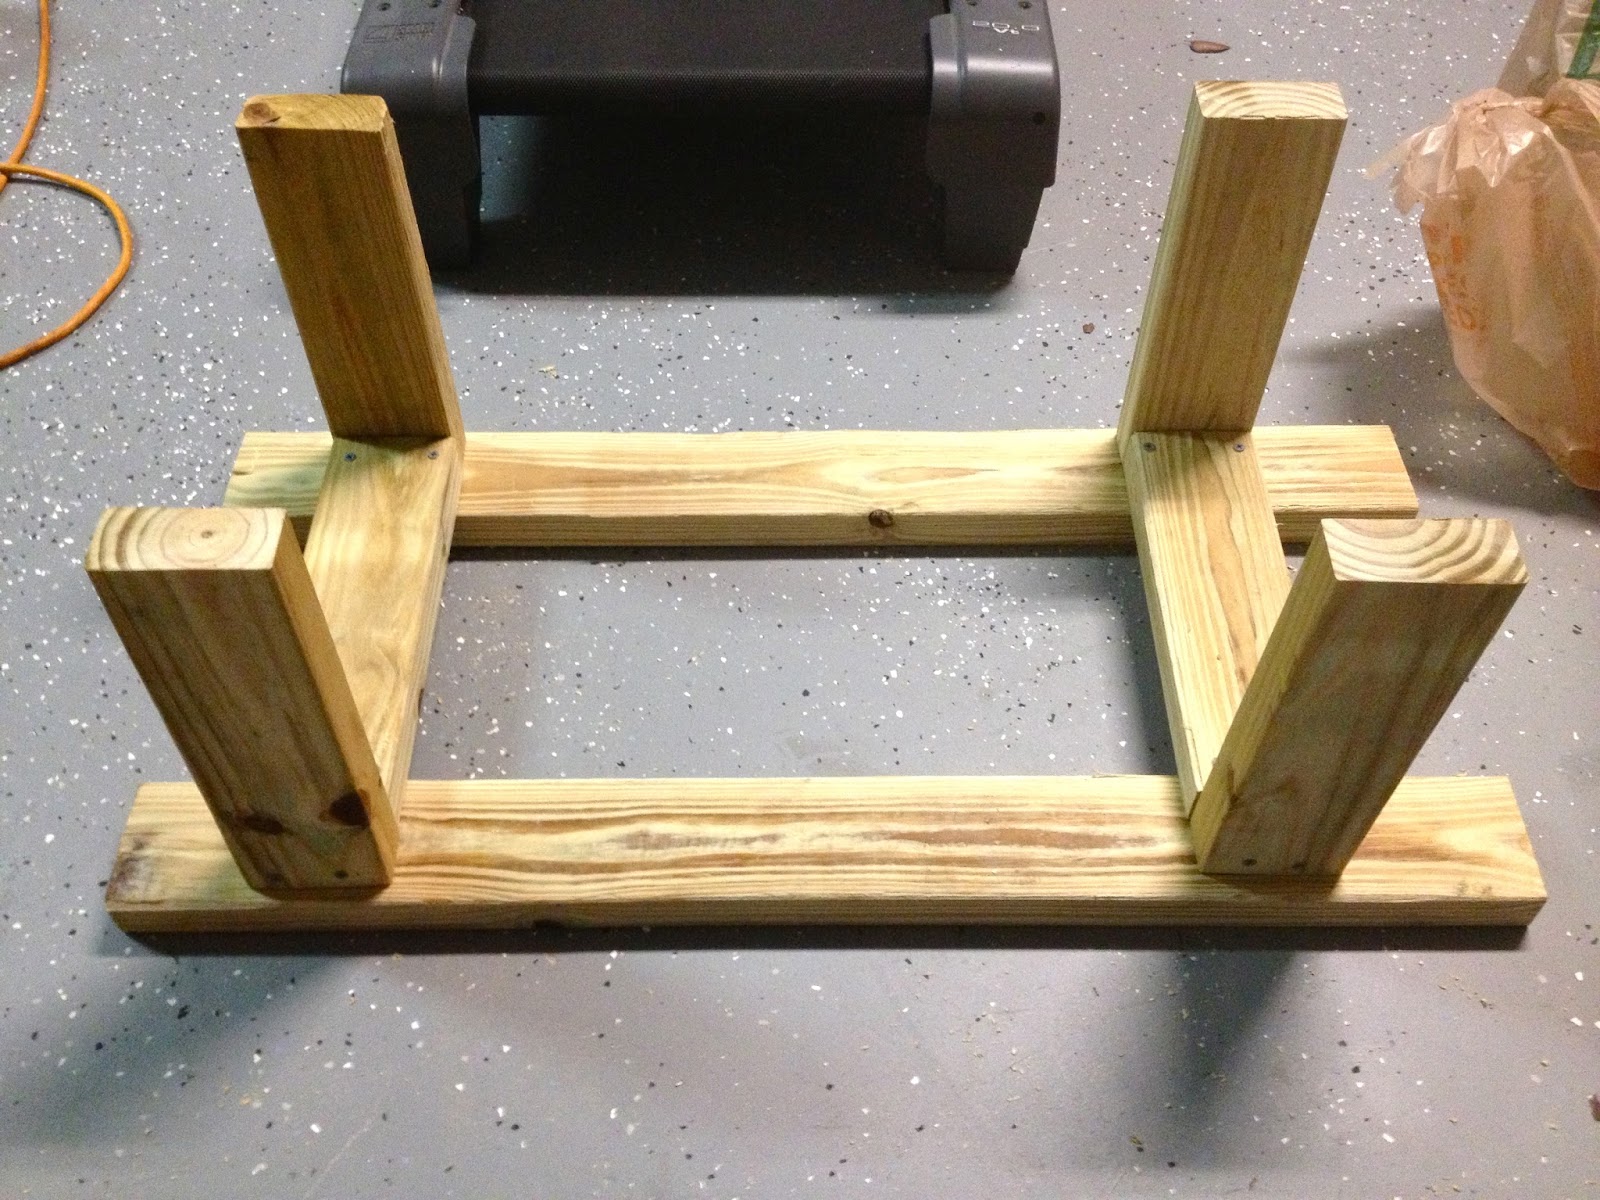

The long support beams fit perfectly on the sides as you can see, and the stabilizing braces also evened out nicely, with the edges approximately centered on the long support beams. You'll just have to eyeball the spacing of the braces from each other. You'll want them about 4" in from the edges. That seems to center the weigh on the legs nicely, while still having the legs close enough to the middle that the support beams won't sag in the middle over time. Also, make sure that the 2' segments settle nicely in next to the support braces, like above.


Step 3)
Screw it all together! Two screws per piece, reference the picture of the finished stand that's flipped upside down. The screws going vertically through support beam <-> braces are wide set, about an inch in from the edges. The screws going horizontal through leg <-> brace are a bit more closely set, that way they run on the inside of the vertical screws.


PRESTO! Your super amazing, ridiculously good looking hive stands are complete! How sweet is that? It took me a longer time since I was kind of generating the plans for this as I went along, but I'm sure it will go much more quickly for anyone following this. It's a lot more simple than other plans, three major steps, and costs $5 per piece of 2x4. That's pretty hard to beat! Store bought stands can run $40 EASY. These can each support two hives with telescoping covers, and can easily be lined up so that the beekeeper can walk down a pathway, with hives on both left and right, with entrances facing away from the keeper.

Not too shabby methinks.


Tuesday, July 30, 2013

New Logo x2!

   Not one, but TWO new looks! My good friend Angela (http://loveangelaan.blogspot.com) redesigned the logo (and Gentlebee) to look more warm, as well as to be more "print" friendly for shirts/cards/etc. Just look at the little buttercup he's drinking from! Also check out the banner at the top! So awesome! The wallpaper is going to need to be changed to match too. I'll have to do some wallpaper hunting tomorrow.

   Also, I was planning on revealing the artwork along with an update on the bees, but things have been crazy in real life! My remote-access IT job started (9am-7pm Fri-Mon), as well as working again as a veterinary assistant (7/8/9 - 7pm Tues-Thurs). Yes, that's a 7 day work week. Unfortunately that only leaves a few hours each night to take care of the seven projects that are in the works. So each night has pretty much been devoted to just one task, except for 30mins-1hour each night of teaching myself HTML. Hopefully the new website will be up soon and the blog can be transferred over to a real-deal url, that being Zeekeeper.com.

   All of this work is going to be worth it though, things are on track to purchase 20-40 acres of land in seven months. Depending on the parcel size, it'll either be entirely in cash or more than 75% down. There'll be plenty of space for setting up bee yards on the parcel corners, an area for training the future hawks and falcons, plenty of space for farming if my friend decides to co-op, space for setting up a wood/metal/glass community workshop, and a LOT of semi-wild land for training and raising Japanese hunting dogs. Most of the parcels I've viewed online are bordered by completely undeveloped, wild land too, which is excellent!

   As for the next blog update (with hive stand tutorial included, I promise!), it'll be posted as soon as I get pictures from today's hive inspections. My buddy, Davis, came along to see what it was all about. From the sounds of it, he'll be starting his own hive soon It's still to be decided whether he's going to pick up some Italian-Carniolans or if I'll split the Wildling hive and give him a nuc of my bees. The Wildlings are real close to swarming... I can feel it in my bones. So tomorrow morning they're getting a second stage. If they're still looking "swarmey" on Thursday then I'm going to split them, with two frames of eggs + one frame of honey into a nuc box, and see what happens.

Friday, July 19, 2013

Do You Want Ants? Because That's How You Get Ants


   To preface this post... it's going to be long. Real long! Mainly due to how many pictures there are, and the fact that it took two days to complete (several reasons behind that). I'll save the honey extraction for the next post. Also, this is the first time I've done a REAL cut-out alone. Not a tree pot cut-out, this was a "manually cut through plywood, hammer/claw out nails, and be exhausted at the end" cut-out. Oh, this was also all done in a 15' x 15' shed with no ventilation or airflow, all after rain, and in the 90+ degree Florida heat. Fun stuff!

   This one was actually on the property of one of the guys painting my parent's house. The bees had been in the shed for almost two years, and were very docile, except when the lawn was being mowed. That's pretty normal and they sounded like the average, pleasant feral bees. He asked how much I would charge him, and I threw out a lowball of $50. It sounded like a pretty straight forward job, and the bees definitely sounded like they were strong, durable bees (like most feral bees). So I figured I'd sweat it out, get a nice big, strong hive, and a good amount of honey to make up for the low amount charged for the job. Unfortunately I was wrong, as you'll see later in the post. However, they did have some excellent honey, and a good amount of it. So in the end I still came out with a respectable trade of time/experience/pain for honey/tools/experience.

   Now, normally just to have an exterminator come out would be $300-400 dollars. When an exterminator is called all they do is gas the hive with insecticide, killing off the entire colony, which sucks! Not only is it leaving a vacuum for more aggressive insects (wasps, bees with a higher ratio of africanized genes), but it leaves the home owner with a giant mess of decaying bees, larvae, wax, and honey. Exterminators don't go in, cut out and clean the hive, and relocate the bees so they can help the 5 miles around the hive thrive with plant life. So in the end it's a loss for everyone except the exterminator.


   Oh, the best part of hiring an exterminator to remove the bees is that if YOU don't remove the decaying hive, then ants will do it for you. I don't really think you want ants, do you? A dead hive is a meat and honey buffet for ants, beetles, moths, wasps, raccoons, and a variety of other vermin. So in the end, unless it's an easy to access area, the homeowner will have to cut in and get it all removed anyways. So there'll be repair costs to the property anyways. Better off hiring a beekeeper to remove the bees, cut it all out, and then all the home owner has to do is patch it up. Just make sure they're not wasps before calling a beekeeper to come out... wasps don't make honey.

Day 1


   Anyhoo, on to the cut-out! The homeowner told me that potentially the entire floor was a beehive, considering how long they were there and how many bees they were seeing. It was definitely a possibility, but that'd be a pretty big hive for the pretty average amount of bee traffic I was seeing. 

   
   I did my first cuts using my ryoba saw. It's a Japanese pull saw where the sawing action is done on the "pull" motion. Mainly it uses your back/shoulder/lats. I could saw all day with this thing! Best $25 I ever spent.


   After a few exploratory cuts I dipped my phone in and took a few pics. Yup, definitely bees down there! This cut was 4 feet from the entrance, so far the hive was 4 feet wide. Pretty legit hive! One thing though, there was a pretty high ratio of drones... that could mean a laying worker instead of a queen.

   "Cut through plywood and just lift the whole piece of wood over" was the plan, but I did run into a few road bumps. Namely the NINE BILLION ancient nails buried in the wood. I cut around the perimeter as much as I could, but eventually those nails just had to go. Not only did they line the sides of the plywood sheet where the bees were under, but there was another support plank going through the center of the sheet. The first day I ended up using a flathead screwdriver and hammer to chip away the wood for each nail, then once enough was chipped away it was dug out with the hammer. Eventually I had to go to class though, so I called it after 4 hours. There was no way to do any more than 4 hours in that heat though. It had rained just prior to starting, the early afternoon sun was beating down, and I was wearing a full thickness bee jacket and hood. 

Day 2


   Yup, that's the dimensions of the hive. 4' x 4' doesn't sound like all that much, but just wait until you get to the next picture. Thankfully one of the homeowner's neighbors loaned me his saw. I'd also bought a cat's claw (mini handheld crowbar with pointy V's at each end, designed for digging out nails) for $17, so there went almost half of what I was charging. I'll definitely be charging an appropriate amount for the next job ha.

   It took about an hour and a half of nonstop hammering to get all of the nails out of this board. Meanwhile there were some agitated bees in the air and it wasn't worth missing work again due to another case of "MMA Face". So it was definitely break time, again, before tackling the hive itself. Once the comb is exposed, it's best to just go through it to the end. Stopping only gives time for the queen to get into some impossible corner, brood to overheat/underheat, and the bees to get even more stressed out. So that also means no feasible way of drinking water while in the midst of the bees, plus my gloves were going to be honey soaked. I have a "thing" about sticky hands and grabbing sticky things... I probly shouldn't have picked beekeeping haha.


   I'd brought a gallon of water with me, and 1/2 of it was gone by the time I'd taken this picture. My shirt is all sweat, no water involved there. It's right about here where I reminded myself for the twelfth time to charge a reasonable price.


   Not a bee, but this guy was pretty neat. He just chilled on my elbow for a good five minutes while on my break. I always liked the bugs with metallic sheens. They're like little transformers, and there are a ton of metallic bees too!


   I'm really happy with the picture above and below. Before flipping the plywood sheet I decided to snap a few closeup shots since the bees were so friendly. Throughout the entire cutting and hammering process they'd gone about their business, without so much as a few passes to see what was going on. Somehow these two photos came out perfectly in focus, perfectly lit with natural light, and are great closeups of the bees. 


   Honey bees really are neat little creatures. It's incredible how perfect their form is for what they do.


BEHOLD! See all those leaves? They're from how monstrously fast this board was squatted upwards. Eat your oats.
Just kidding, they're actually stuck to the comb, and I'm way out of shape. This panel weighed about 100lbs before a quarter of the panels fell off due to weight + heat. 


   This picture was taken a bit after the first one. At this point I'd established that there was no queen here. There were thousands of drones, no eggs, no larvae, and the only brood was capped brood and capped drones. The capped brood was very spotty in it's pattern and all of the open cells between capped brood were all filled with honey. This was pretty much the same exact thing I'd seen a few weeks earlier, when helping Mike out with the bees that were under the eaves of the foreclosed home. 

  What this means is that the hive had swarmed, with the old queen leaving with half of the hive. For whatever reason the new queen hadn't survived, and there wasn't any young larvae at that point who could be raised as queens. At that point they were hopelessly queenless.

   Since I don't own a bee vacuum, there would be no taking home of these bees. They were doomed to die out simply from age, and the bees knew it. There was no closed loop of baby bees taking over the duties of the older bees since there was no queen. So their resources were being entirely invested in honey and pollen to raise massive numbers of male drones before all of the female workers died. 

However, their genes would live on through the drones, who would go out and mate with virgin queens. Bittersweet, but that's still chalked up as a success in nature's own brutal way.


   Here's one of the drones from the hive that had decided that he was driving. Pretty cool looking! Very wild feel to his deep orange abdomen with black stripes, and his really neat orange feet! The "aviator" eyes are really clear in this picture as well, and by that I mean eyes that wrap around fully to the back of the head (just like dragonflies).

   I did learn some solid lessons that day as a budding beekeeper. Mainly: charge an honest amount for the effort and knowledge involved, every beekeeper should own a CamelBak, and every beekeeper should own a bee vacuum if they intend on doing cut-outs.

   After getting it all wrapped up I was ready to just fall down face first on my bed. The equipment got cleaned off, put away, and the honey was left for tomorrow. It was such all-in work in such muggy, awful conditions that I had only noticed one sting. The next day, after waking up, I counted out the stings and it was a solid eleven stings. Six in my left hand (one with a stinger still embedded under my skin), one under my left armpit, one on my left ear, and three on my right hand. 

Oh well, the stings are good for the body, and it just makes the honey taste that much sweeter.

Tuesday, July 16, 2013

Zeekeeper Honeyworks + Awesome Logo + Updates!


   Check it out! How freaking cool is that?! This is the first version of my company logo, designed and illustrated by my good friend Angela An. She does some really incredible things, and has a really sweet illustration style like Samurai Jack! I've been incredibly touched by her offering her time and artwork to help me get Zeekeeper Honeyworks off the ground and looking sweet! We've talked about doing some really cool things with honey labels, one example being a season-based illustration for the label, depending upon which season the honey has been collected or bottled in. Just that idea right there has so many ways of being turned into something awesome, and I'm extremely excited about it!

   Angela's blog is super cool (with a great Game of Thrones illustration among other things!) and you should go check it out before continuing with this blog entry!  She does commissions on top of prints of her work, so you should probly think about those too ;) Oh, and it also has the newest version of the logo, which I'm planning on sharing in the next blog post, but feel free to cheat and check it out!

  I also didn't think Z's Bees was an apt enough description for what I want to accomplish in beekeeping, both commercially and educationally. On top of that, there's a Z's Bees out of California so it'd be too confusing. If anyone is familiar with Sam Comfort of Anarchy Apiaries, reading about his philosophy was the catalyst that sparked my interest in the craft. I could write an entire post about my thoughts on commercial methods of beekeeping and farming, so that will be another entry. However, I'll sum it up by saying that the modern generation has a stunning disconnect with where our food comes from, where our species comes from (spoiler alert: it's the forest and wilderness), and the mental/spiritual stress we put on ourselves by maintaining that disconnect. I'd like to create a non-profit division of my beekeeping for holding child-based educational workshops, with the goal of keeping that incredible curiosity burning. In addition, having fun with honey (mead, natural health products like lip balm, recipes) is a big part of my interests as well. No young person of the new generation has ANY idea what an apiary is either, much less an aviary. So the nickname given to me, by my friend Mark, plus "honeyworks" was settled upon. Zeekeeper Honeyworks! I also got the Facebook page off the ground as well, feel free to join up for pics and other things that are shared more often than here on the blog :)

Zeekeeper Honeyworks @ Facebook

Hive Updates

  Wow, it's been wayyy too long since I updated this. Sorry guys! Things got incredibly busy between finals last month, an increase in work hours, and then had to fit beekeeping tasks in with the time between (including a massive cutout, building $3 hive stands, and a $15 solar wax melter!). So there really wasn't time for blogging in between, just uploading and editing all the photos that I'd taken to keep picture records.

   So I'm going to have to split these updates into four different posts. 
1) Individual hive updates
2) Cut out of a 1 3/4 year old feral hive, which was living under the floorboards of a tool shed
3) DIY: Building cheap, easy, durable hive stands for under $5
4) DIY: Building a solar wax melter for under $20 (and best of all, almost no assembly required)


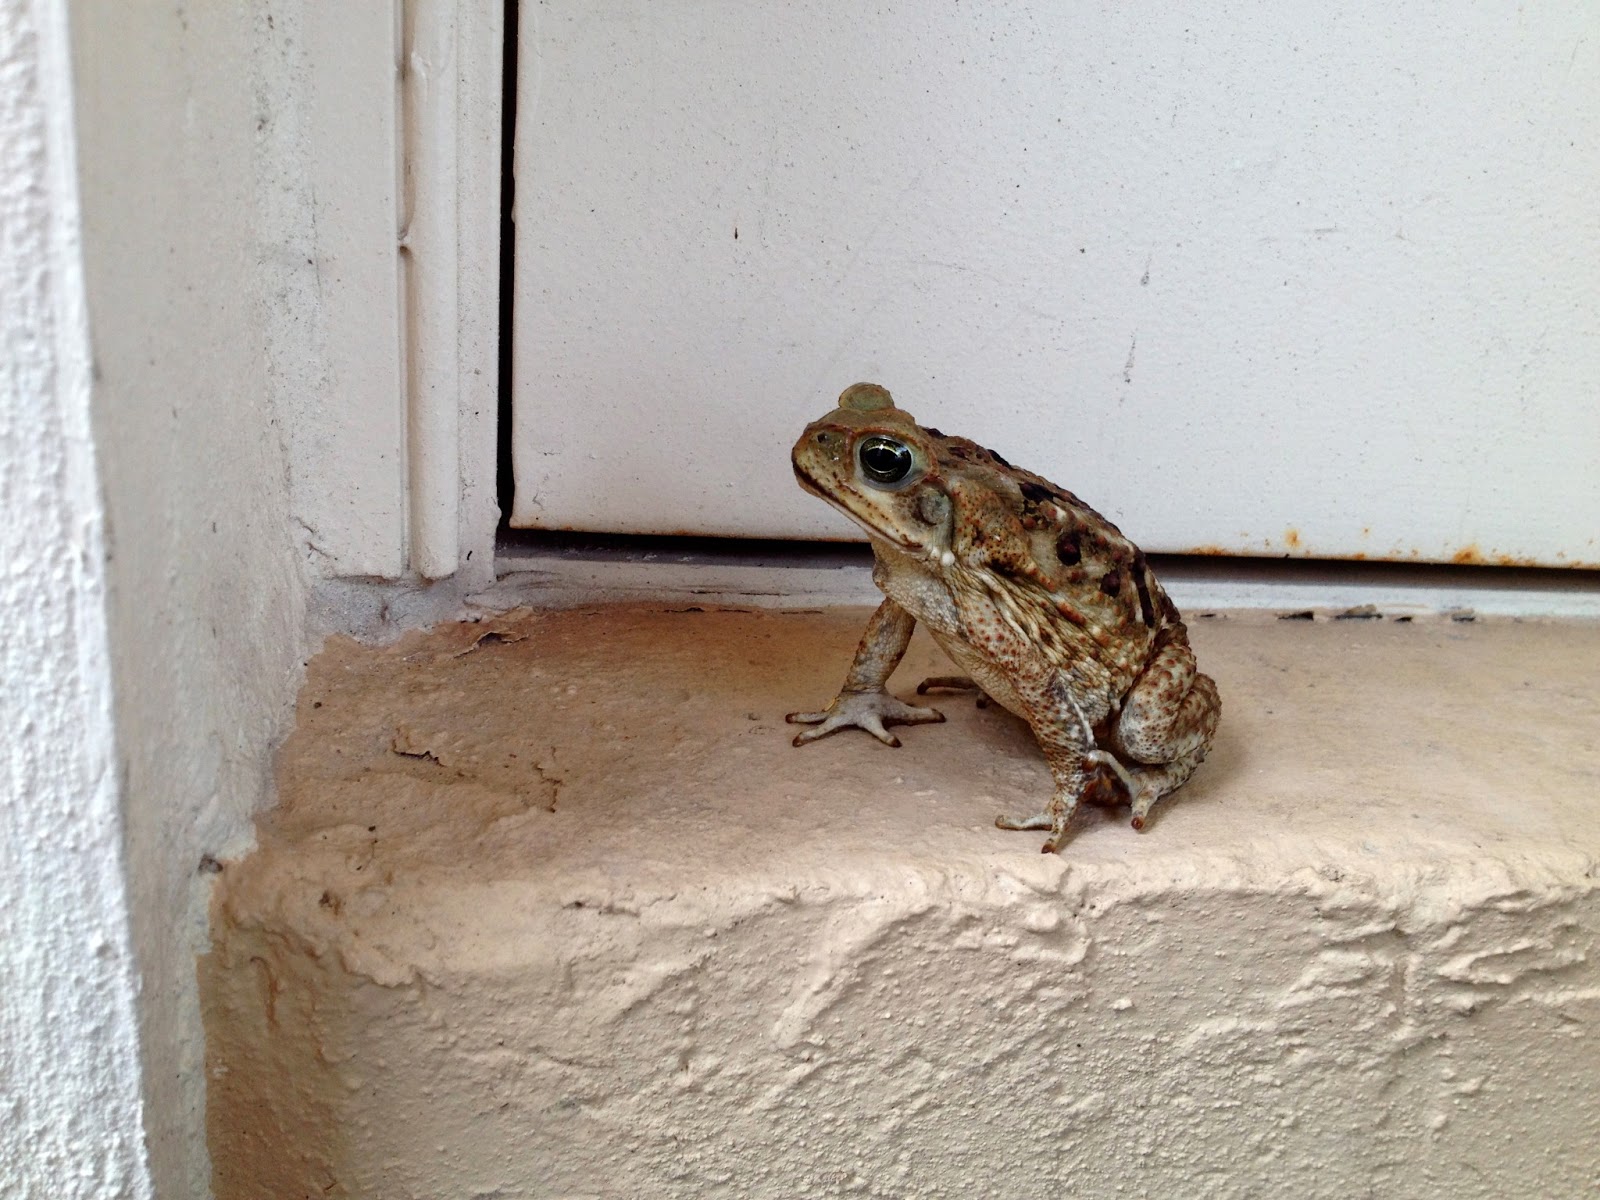
   You may also be wondering why I have a toad as the first picture. I'd noticed that there weren't any dead bees around the hive and figured the ants had been taking them away. Then I noticed a toad when I went to do some evening hive checks, the week after that there were two toads, then three toads. Soon enough, all three toads stayed nearby day and night. It's the time of year where toads are reproducing so it's wasn't much of a surprise, but the lack of bees was still a mystery. 

   Then one day it clicked after seeing a dead bee get gobbled up by a toad. These three had made my backyard their home! They were hoovering up any and all bees that they could! All of this really has nothing to do with beekeeping. They were like my clean up crew, minus the massive poo logs they left everywhere. I just thought it was funny. They ended up disappearing after moving the Dothraki and Casterly Rock out to the bee yard. Sorry toads!


   As for the hives, everyone is doing quite well! Winterfell and Casterly Rock are both solidly building up their second Deeps. I was going to do a check on Winterfell today but got delayed due to rain, and by the time I got out to them they were mostly home, which means testy guard bees. So they'll get checked tomorrow. The above picture is from a check of Winterfell from two weeks ago. For anyone who hasn't seen it before, that's what drone comb looks like when normal brood comb (on foundation) is expanded to fit drones. Drones are much larger than the worker bees, so the width and depth of the individual cells needs to be expanded. A drone cell in the works can be seen just to the top right of the photo's center point.

A larger view of the drone frame. Solid white capped band of honey along the top, with eggs and younger larvae in the middle, older larvae and capped cells at the bottom.

   Casterly Rock thoroughly built up all 4 frames and will be getting their last 6 frames in the morning. 

   The Dothraki have also moved into a full size hive! They're doing very well ever since their new queen began laying. Something interesting was noted since they were also given two frames of comb from a cut out that I did. More on that with the next post though!

    I was also only able to do a quick observation on the Wildling hive due today's weather delay. No real update until tomorrow. They are happily going about their business though!

Fun Fact: Galleria mellonella may have the highest hearing sensitivity of all animals. They can hear ultrasonic frequences up to 300khz.
   If you haven't seen a wax moth before, this is what a wax moth looks like. Specifically, the Greater Wax Moth (Galleria mellonella). It belongs to the snout moth family, so it looks like they have little stubby "snouts" on them similar to a dog's snout shape. These things are bad news! If they gain access to a hive that hasn't built up to fill their living space then these moths can cause some serious havoc. Their larvae will hatch, eat comb, and leave a messy, silky mess everywhere. No bueno! This one tried to Solid Snake itself in when I was checking the Widlings. Thankfully I noticed a dark shape on the underside of the new frames, which wasn't there before, when putting the inner cover back on the Wildlings. Shame that they're so nice to look at... it got squished.

I'm going to keep this entry short, since it's just a summary, and there's a good deal to write about the cut-out and how-to's of the honey extracting! Expect the cut out entry to post tomorrow morning. I'm going to write it tonight, but I'm dedicating some time every night to learning HTML5 and CSS for building Zeekeeper.com. So it'll probly be a little too late for most people to read. Blog posts made good morning reading over coffee anyhow. Lots of HD pics will be included as well :)